
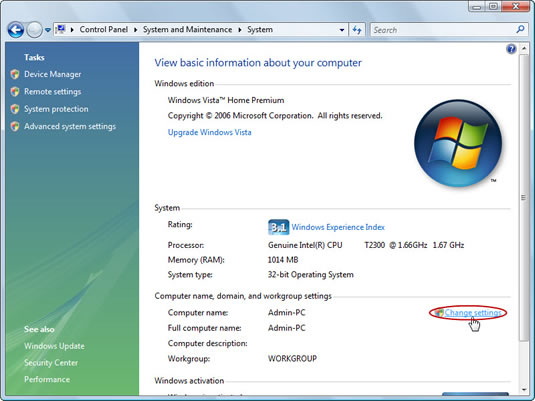
Click the Change Settings link located in the Computer Name, Domain and Workgroup Settings area.
Click the Continue button if you’re prompted with a User Account Control security warning.
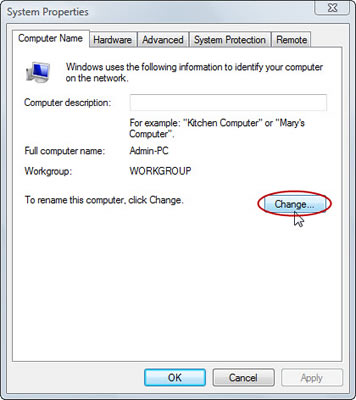
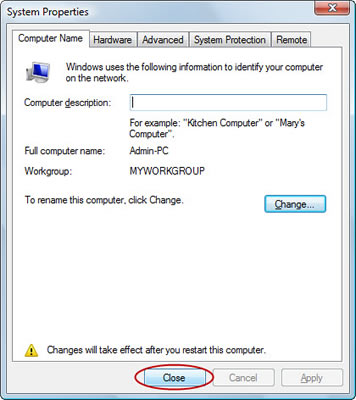
Click the Change button.
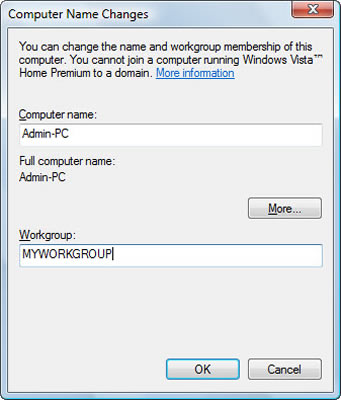
The Computer Name/Domain Changes dialog box appears.
In the Member Of area, select the option labeled Workgroup and type the name of the workgroup.
Either enter the name of an existing workgroup or create a new name for your workgroup here. The workgroup name should be short, with no spaces.
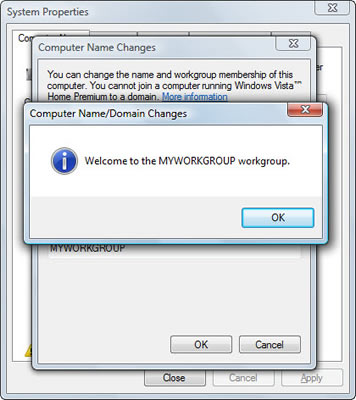
Click OK three times to close windows.
You want to close the Computer Name Changes dialog box, the welcome message, and the restart message.
Click the Close button to dismiss the System Properties dialog box.
You can also close the Control Panel window, if you want.
Restart Windows.
To view all computers belonging to the workgroup, open the Network window.

James John
Software Engineer


![[MOBOROBO] ANDROID SUITE FOR PC](https://donjajo.com/wp-content/uploads/2013/06/1_20_06_13_1_52_10-150x150.png)